Happy Halloween

I have never been into doing anything for Halloween. I do however always buy some sweets so that if any children knock on the door, trick or treating, I have them ready to give out.

Last year no children knocked on the door and we gave the sweets to our grandchildren on their next visit to us so this year I have chosen chocolates. This means if no children knock on our door we can eat them as desserts after lunch. We don’t like sweets but do like chocolate!

Halloween Chocolates

Halloween windows

Right on cue our windows had the ghostly look this morning as if ready for Halloween and that is as much Halloween as there will be in our house! Happy Halloween to my readers.

Posted in Chickens | 6 Comments

Vintage crockery

On Sunday we did an afternoon tea on our vintage crockery for a birthday party. We have one wedding booked for next year already and another wedding that want to book us but they wanted to come and see one of our teas before confirming.

We invited them to come and take at look at Sunday’s tea. I also set our table for two so they could get a feel for how it will look. Of course you have to imagine sandwiches on the sandwich plates and cakes and scones on the cake stand.

Vintage table setting for two

We have mostly three tier cake stands but the two tier one fitted the photo better so I removed the three tier one. It’s only to get an idea of the look. When a wedding table is set up it does look really pretty.

I think our visitors were impressed and we sent them home with a sample plate of sandwiches and of cakes and scones for their lunch.

Our other wedding booking have already visited us to look at an earlier tea and we haven’t yet had anyone visit who hasn’t gone ahead and booked us. I think when it comes to a wedding people (quite rightly) want to see what they will be getting.

We haven’t yet had anyone who hasn’t been impressed with our tea and our crockery. Vintage crockery seems to be more fashionable than ever at the moment and we do more afternoon teas every year than the year before. I think it was one of our best ideas.

Posted in Chickens | 6 Comments

Snuggling up together

When I checked on the girls at bedtime the night before last I was surprised to find them all snuggled up together apart from Freckles. Last night they were in the same positions again. I think this may be the new routine going into colder nights.

All the girls are together except of course Freckles

Freckles is in her own spot as usual

I love to see them all snuggled up together

I think as long as Emerald gets her favourite corner spot she isn’t bothered what the rest of them do and Speckles is happy to have any of the little girls beside her. It is rather sweet to see them all so close together.

My husband said that Dandelion doesn’t look like a chicken and I said that she looks like a pompom with a tail. They are a cute bunch!

Posted in Chickens | 5 Comments

A pair of water butts

For some time I have been frustrated that a corner of the chicken shed has been damp at  floor level after we have had a lot of rain. My husband recently put a wooden overhang on the chicken shed roof to try to take the rain away but we realised that part of the problem was that the concrete in that corner was staying wet and the damp was soaking through the wood from the bottom of the chicken shed.

Because of the fence to the side and behind the shed, it doesn’t get any sun to dry it out. The last thing we want is damp inside the sheds or for the wood to rot.

We have guttering on both the chicken shed and the big shed and had thought that pointing it away from the sheds would take the water away but instead the water was puddling and both sheds had a damp corner. My husband suddenly had a light bulb moment and realised that what we needed were some water butts.

The large expanse of both shed roofs were sending all that volume of rain water towards the sheds. We researched the best price for slimline water butts and found that Wickes had the cheapest and they also came with stands. We bought two and my husband set about installing them.

The back of the chicken shed

I have this wire round both the sides and the back of the chicken shed to protect it from anything trying to chew at the wood. We have never seen any sign of attempted chewing but it’s better to be on the safe side and we check the back of the shed regularly. Its this corner that was getting damp.

The new water butts

I took this photo from the corner in the previous photo so it’s looking in the other direction.

The nearest water butt is the for the chicken shed and the other one is for the big shed. With hind sight we wish we had thought of doing this before but hind sight is always a wonderful thing!

We are hoping that this will solve the problem as it should stop a lot of water standing around the sheds. We will check the butts after rainfall and make sure we empty them, away from the sheds regularly, and they will give us another water source for watering the garden in the summer.

Since my husband extended the chicken shed roof it has already dried out on the previously damp corner and the water butts should help alleviate the problem after heavy rainfall. We just need the next rainfall to test it out. We feel sure that it will solve the problem.

Posted in Chickens | 6 Comments

Getting the veg plot ready for winter

The only thing left on our veg plot was the courgette plants. They still each had five or six tiny courgettes but they hadn’t grown in the last few weeks so we decided that they were finished.

Everything else was already finished but we had left the plants in as we knew that as soon as we removed them the cats would move in and use the veg plot as their toilet.

It was time to clear the plot. My husband removed the spent plants and lightly raked the plot.

In the afternoon we went to our local woods and collected twigs. As luck would have it a tree was down and there were lots of twigs laying around it. We collected quite a haul.

We have collected twigs and started to plant the veg plot

The completed veg plot

Last year was the first year that we tried this and it worked quite well. It keeps the cats off and we think it looks okay, sort of rustic, and better than being just empty. It will stay like this now until the spring.

Posted in Chickens | 6 Comments

More cookies

I never usually do much baking but since I adapted Jamie Oliver’s apple crumble cookies to my own version I have really got into trying them with different fillings.

I took my eldest son, Steve, some cookies with raisins for his birthday. They are my current favourites.

Today I decided to try chocolate chip cookies and chocolate chip and peanut cookies. I liked the chocolate chip and peanut best out of these two.

Chocolate chip and peanut cookies

Next I am going to try cherry cookies and peanuts and raisin cookies, I also quite like the idea of peanuts, raisins and chocolate chip together.  I am going to keep trying different versions until I find the ones I like best.

If anyone wants to give them a try this is my adapted recipe:

Ingredients

100g raisins

200g self raising flour

100g butter

100g golden caster sugar

1 large egg

Method

Preheat the oven to 200 degrees c. Line two trays with grease proof paper rubbed with oil.

Put the flour and sugar into a bowl and grate the butter straight from the fridge into it and then rub it in as if making a crumble or pastry. I prefer to do it this way as it’s quick and easy and there is no need to soften the butter. This was a tip I picked up in my youth while making large quantities of pastry for a pub kitchen.

Mix in the egg. Add in the filling. When doing two different fillings I split the mix in half at the egg stage and add  50g of each filling to each half.

Divide the mixture into 24 bits (12 bits of each if using two fillings). Roll into balls and press down lightly into 4cm rounds, lining them up 12 to each tray. The mixture is quite sticky and rings need to be removed for this. I flour my fingers to press them down and the bits look really small but the cookies spread when in the oven.

Bake for 8 – 10 minutes or until lightly golden brown. Cool on a wire rack.

I love that these cookies need few ingredients and are simple to make and quick to cook but can also be adapted to any filling you like. Just switch the raisins for anything you fancy.

Posted in Chickens | 4 Comments

Apricot tries another bedtime position

Apricot is the only girl that keeps changing her bedtime position. She really seems to prefer being with the bigger girls than with Dandelion and Cinnamon.

Apricot has managed to squeeze herself between Speckles and Emerald

Freckles as always is in her usual spot

Dandelion and Cinnamon are in their corner

I’m not sure Emerald is too impressed by this

Emerald didn’t look too happy about being moved from her corner spot and having to put up with Apricot but Apricot looked firmly hunkered down in her chosen position.

This was the night before last and last night Apricot tried to do the same again but this time Dandelion joined her too and Emerald looked even more put out. There was a lot of twittering and pushing and then pecking. Emerald was pecking Dandelion and Dandelion was pecking Apricot and at that point I decided to intervene.

I moved Dandelion next to Cinnamon and then Apricot next to Dandelion. Emerald then jumped down off the perch and went up on to Freckles perch. From there she stepped across to her corner while easing Speckles along the perch.

Harmony resumed as Emerald was back in her favourite position in the corner. Emerald doesn’t like to be moved from her corner spot. I wonder how tomorrow night will pan out!

Posted in Chickens | 4 Comments

Little and large

I love seeing Speckles and Cinnamon together. Yesterday they were at the food dish together.

Speckles and Cinnamon

Again I noticed the large size of Cinnamon’s feet in comparison to her tiny size.

A few seconds later Freckles joined them and moved Cinnamon round from her spot at the dish. Freckles and Cinnamon’s heads are blurred because of the movement but I thought I would keep it as it shows all three heads in the dish at the same time.

Three heads in the dish

I love to see this.

Posted in Chickens | 4 Comments

A look around our chicken run

One of my commenters asked for a look around my chicken run. I said I would do a post on it and then didn’t get round to it. I think that comment was over a year ago. Sorry!

I thought now was as good a time as any. Better late than never.

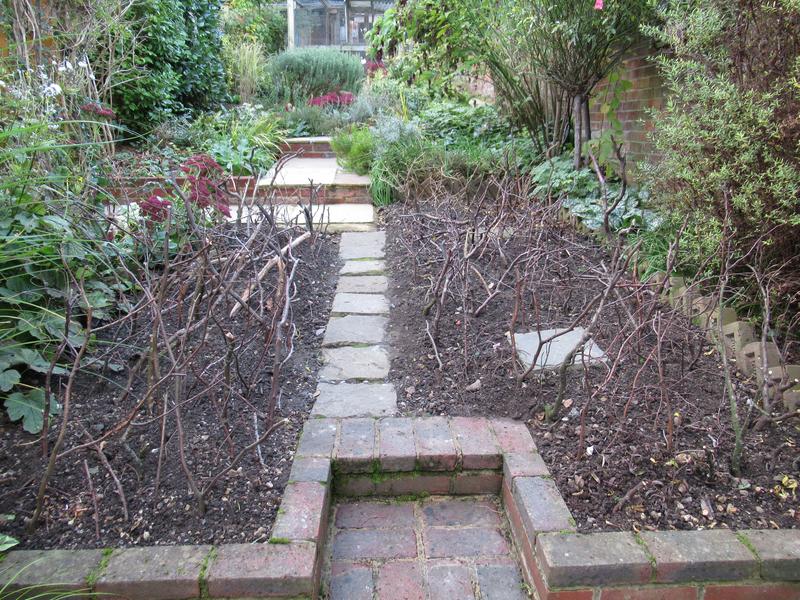
So this is the outside as I walk up to the top of our garden.
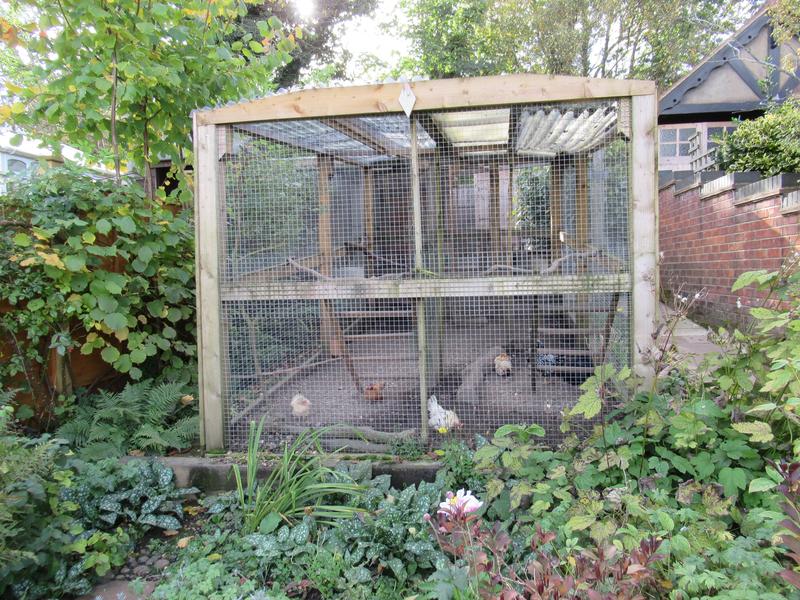
Our chicken run

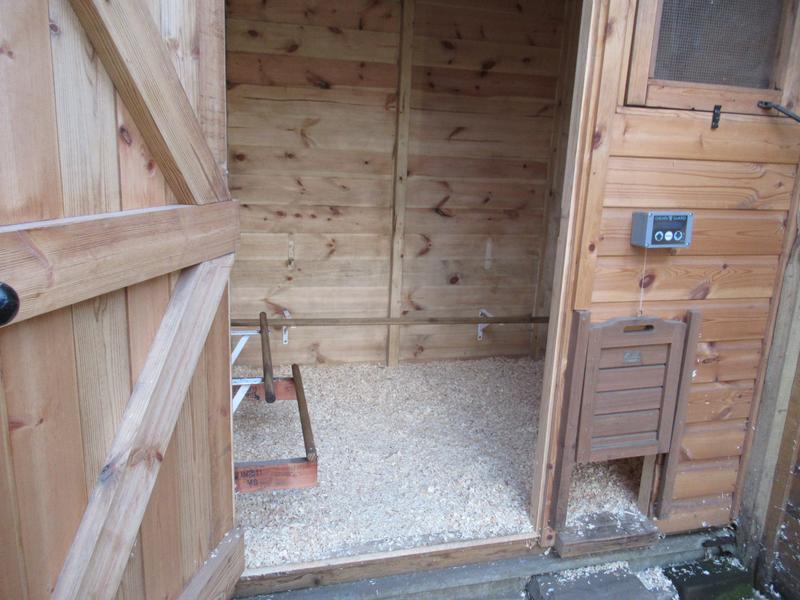
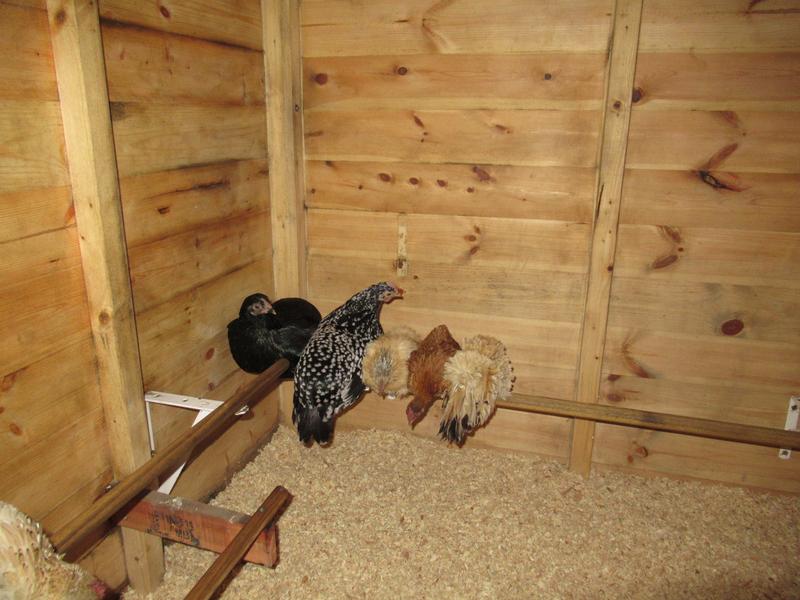
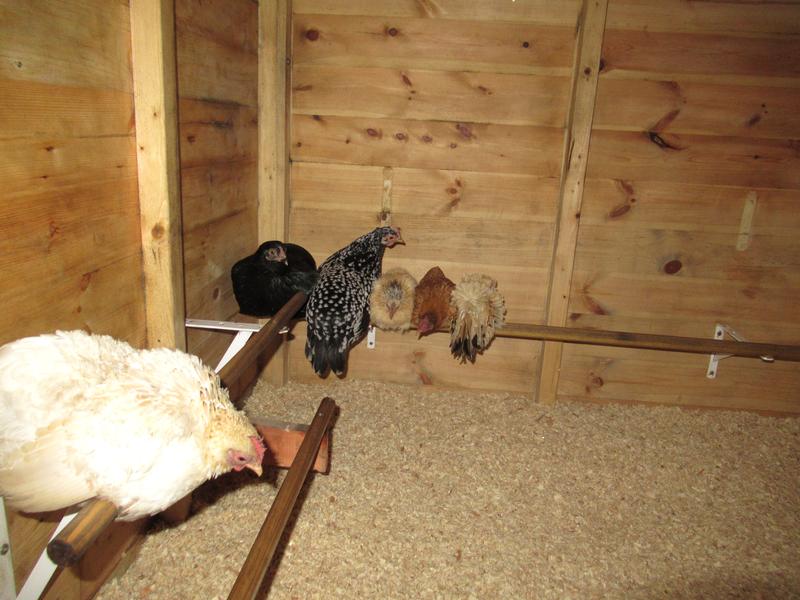
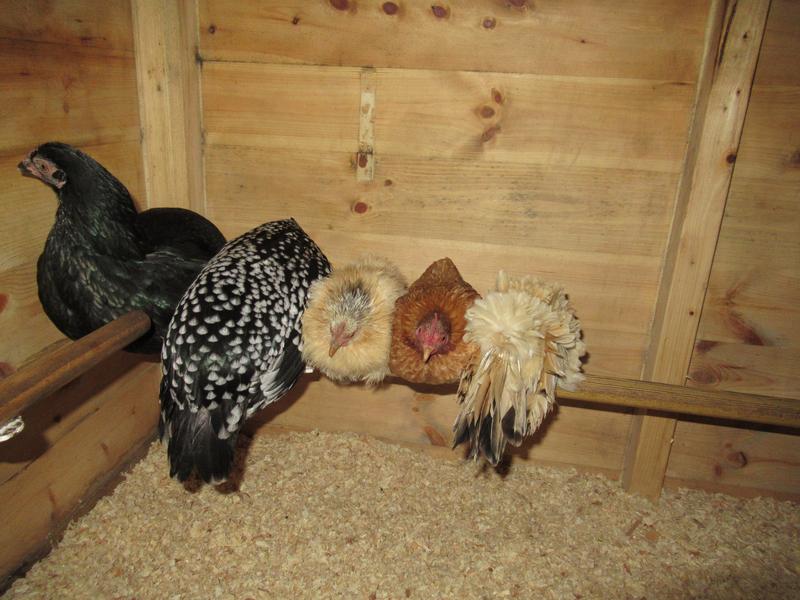
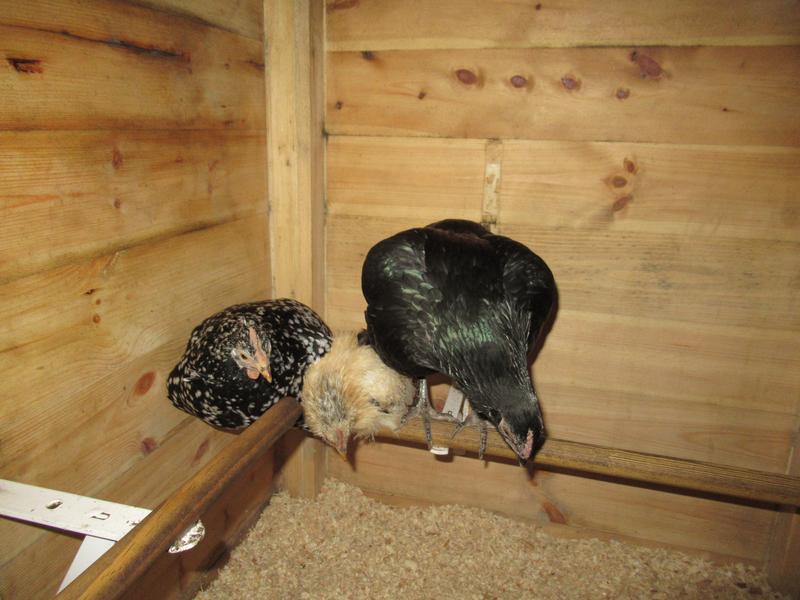
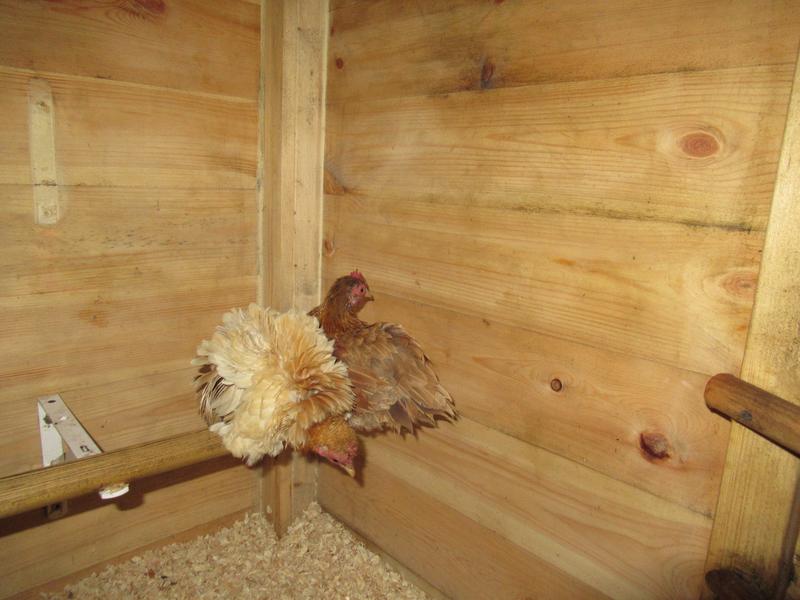
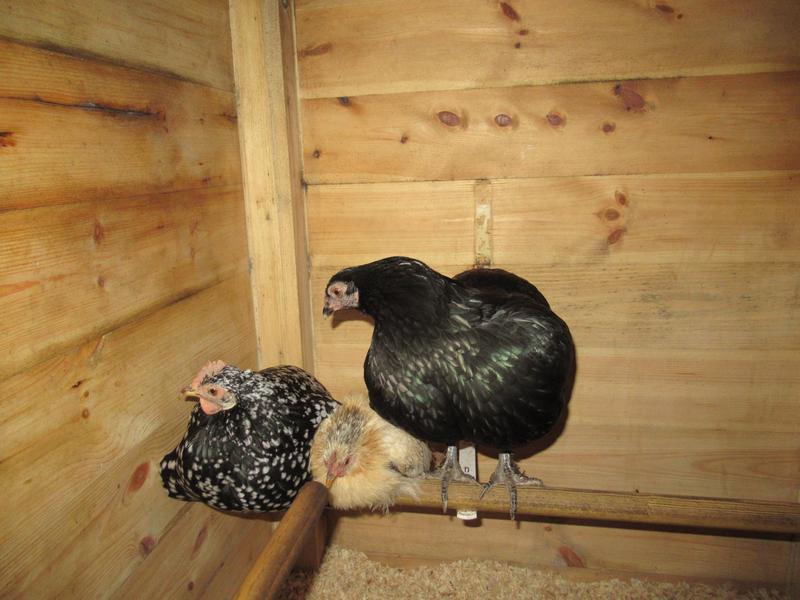
Inside the chicken shed

This has featured on a few posts recently. There are two more perches across the right hand corner. The back perch is favourite and the top left perch is Freckles spot. The pop hole automatically opens at dawn and closes at dusk reacting to a light sensor.

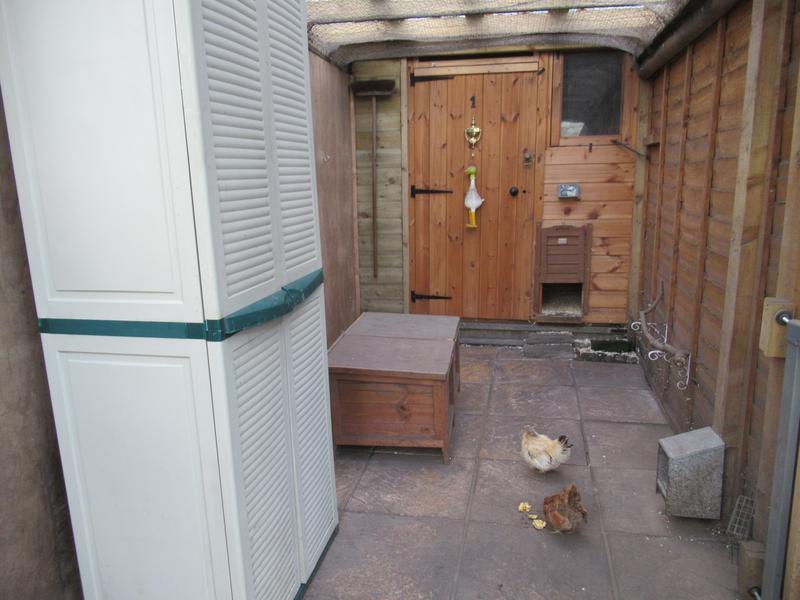
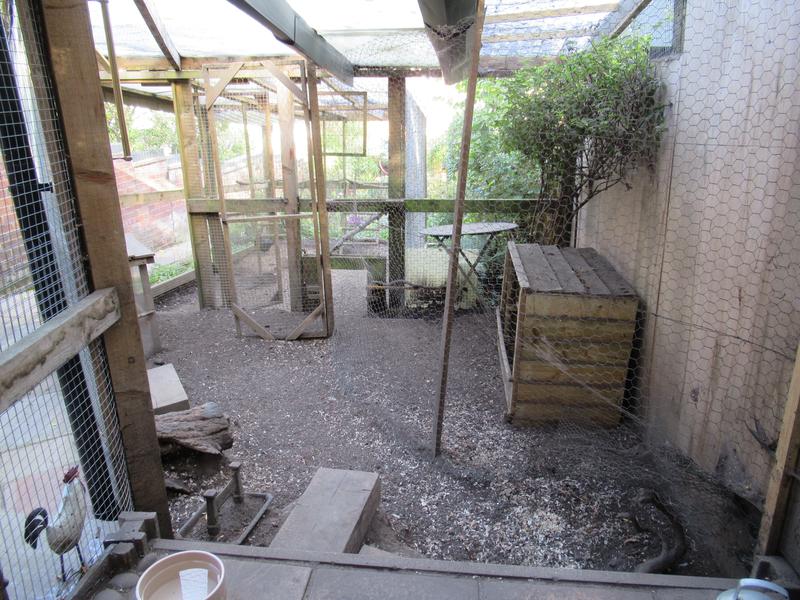
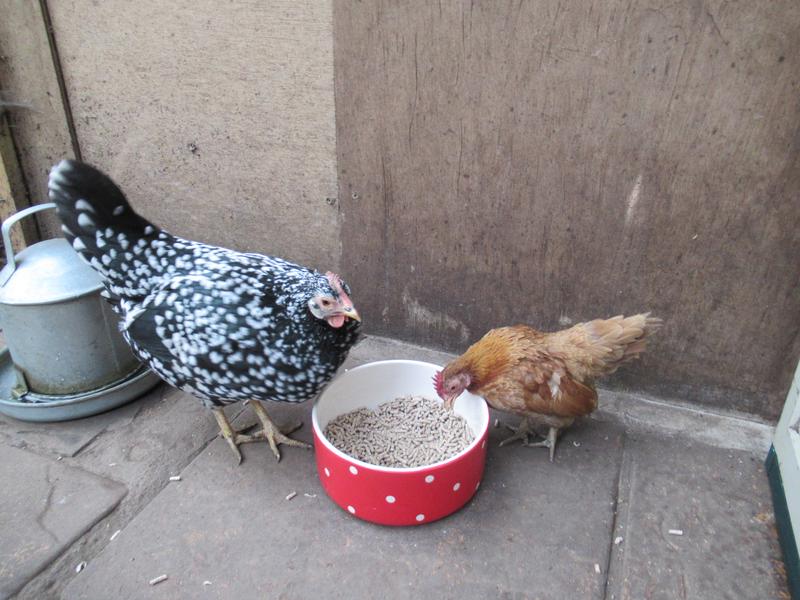
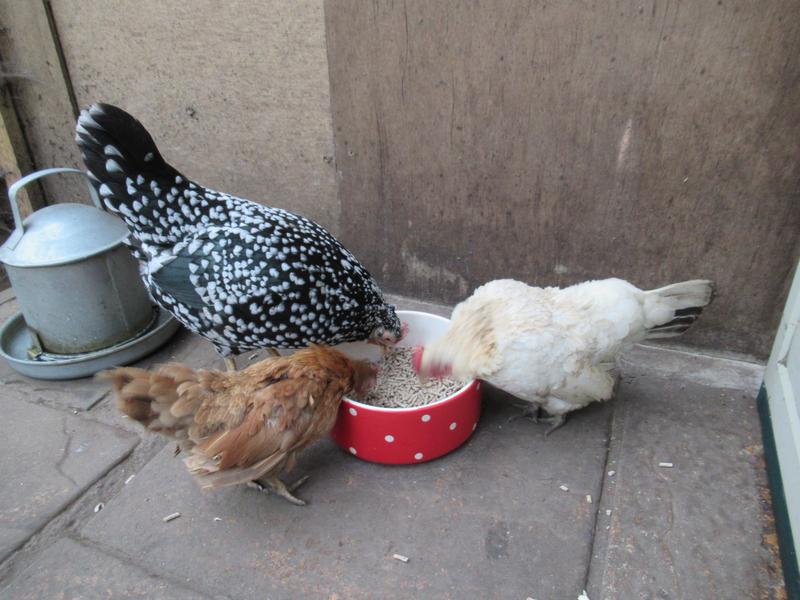
View of the chicken’s patio area

This shows the chicken shed door, now closed, with my broom hanging at the left of it, the two little coop nest boxes on the left and the store cabinet, plus grit and oyster shell dispenser on the right and Cinnamon and Apricot with some bits of apple.

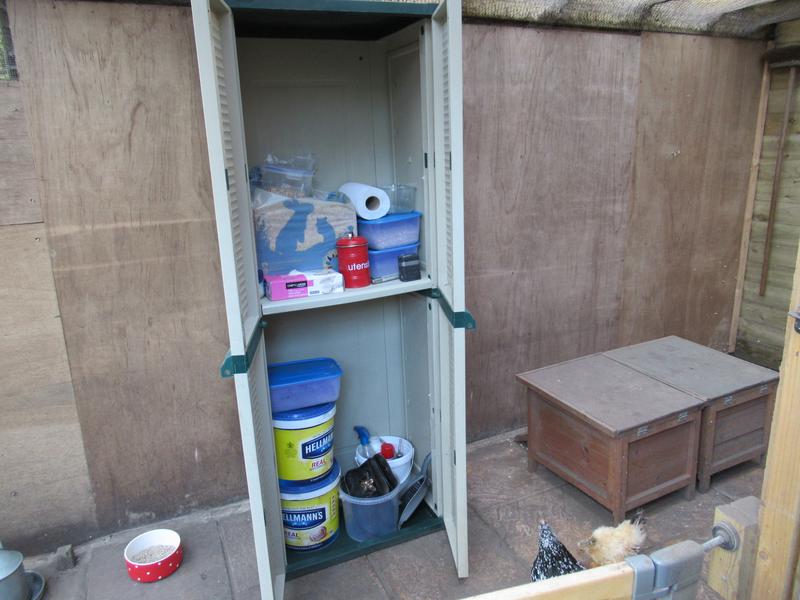
Inside the store cabinet

We chose a tall store cabinet because the previous shorter one meant that the girls would get on top of it and not only make it dirty but eventually they trashed the top of it.

The big plastic buckets on the bottom left have chicken pellets and corn. The clear bucket on the right has my coop boots. Behind that the other bucket has all the sprays and smaller items with the brush and dustpan in front of it.

The top shelf has pine shavings on the left, plastic containers of sunflower hearts, corn, grit and oyster shell, the red container has wet wipes, there is kitchen roll, disposable gloves and two torches.

There have been lots of other items in here but I have recently had a chuck out and got it down to the every day stuff.

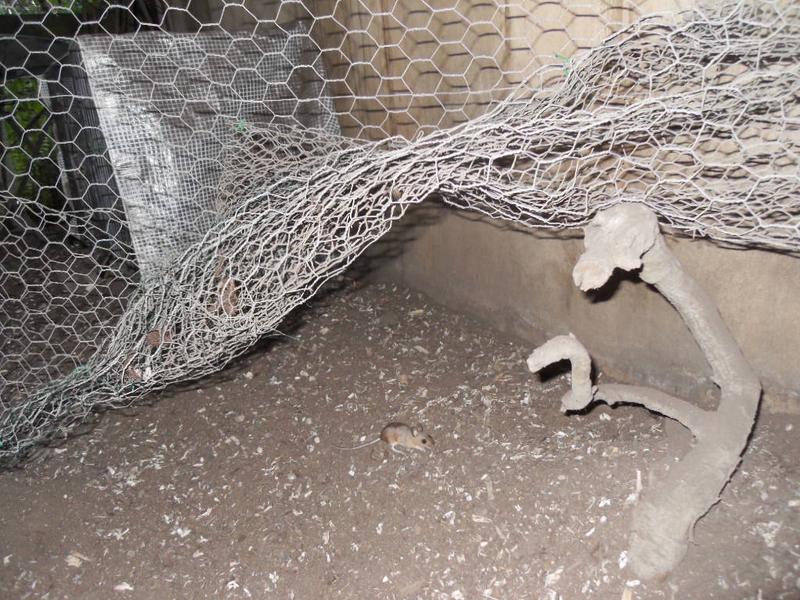
There is a layer of marine ply cladding the fence along the patio area (behind the little coops and the store cabinet) and the right hand side looking out into the run. This is tough and doesn’t rot and can’t be chewed through by rats. It is sunk into concrete on the patio area and goes underground on the right hand side of the run into a layer of tiles and chicken wire. From past experience we have modified the run to keep rats out and haven’t had a problem since we installed the marine ply.

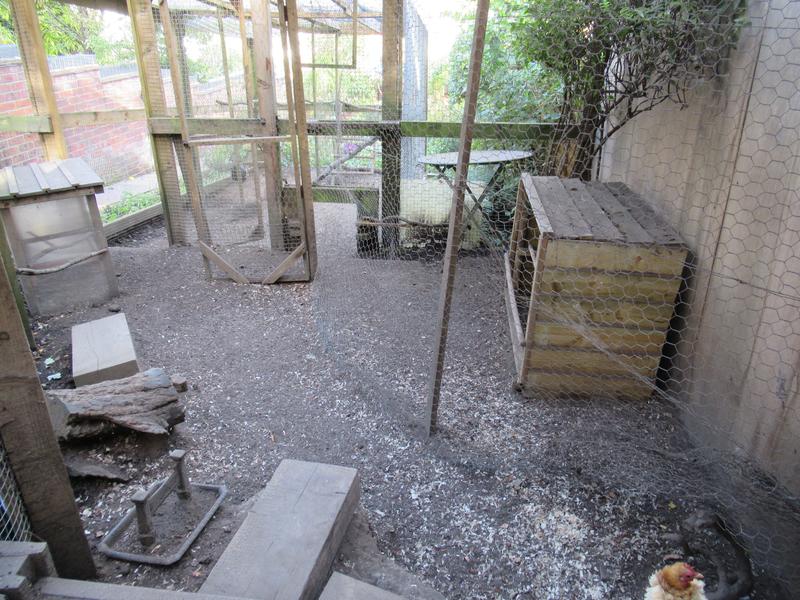
Looking out from the chicken’s patio

This section of the run can be closed off for the integration of new girls by closing the open gate and closing the square hatch.

The two chicken shelters

There is a chicken shelter in each section for extra protection on cold and windy days. Above there are roof panels which are solid on the right hand half of the run to insure that stays completely dry and the left hand side has panels which can be opened on warm and sunny days to let the sun in but closed at other times. They keep it mostly dry but parts drip at the joins in wet weather. There is weld mesh over the top of the panels to keep the roof secure.

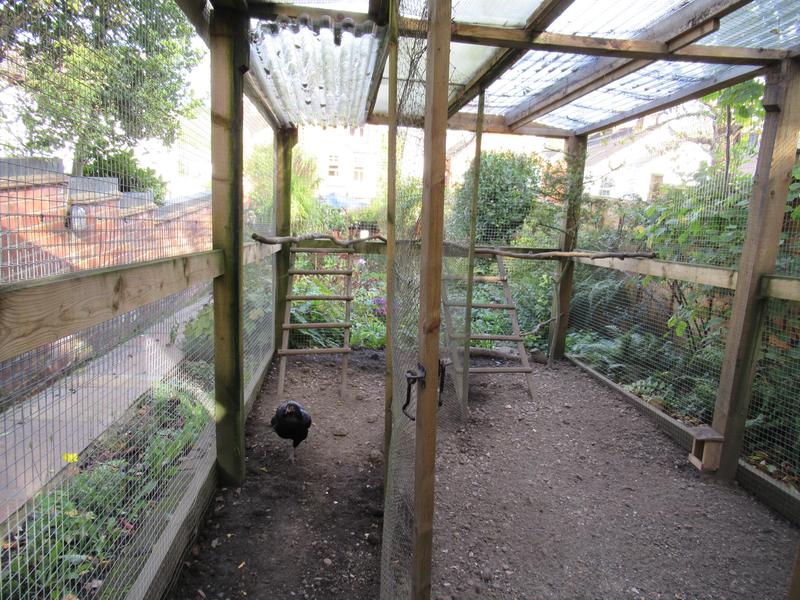
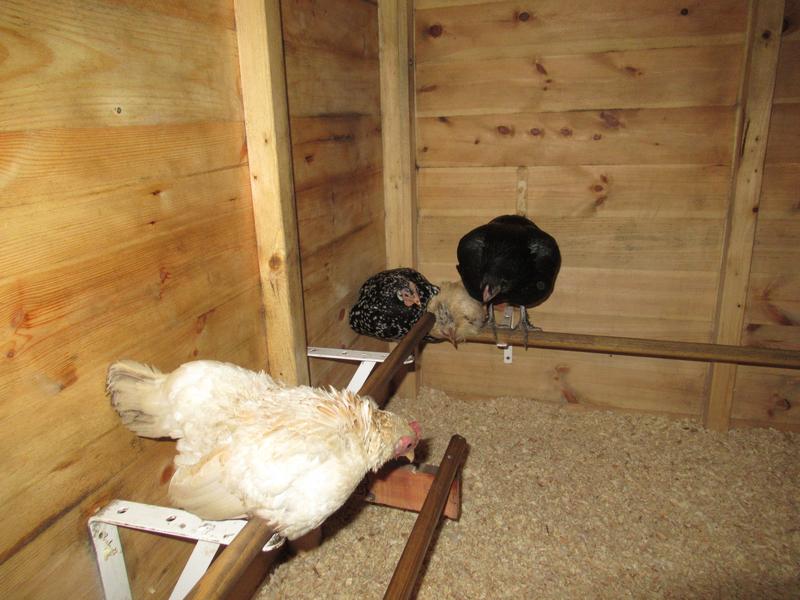
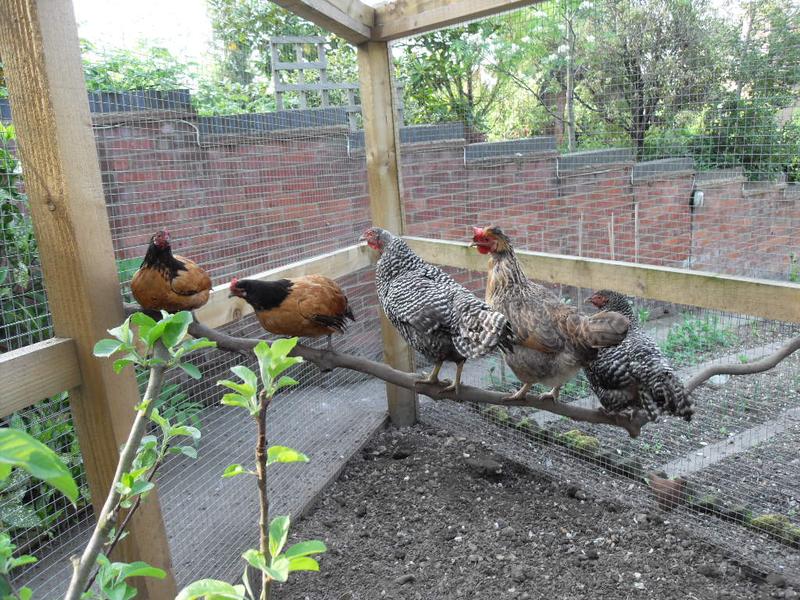
The bottom part of the run

This part of the run has the ladders which are constantly used by all the girls. They like the ladders and the high branch perches above them. Again the two halves can be closed off while integrating new girls. There is a dividing gate in the foreground which is kept open most of the time.

There are branch perches all around the run in high and low positions. The girls like to perch in the shelters and on top of them and there is a round metal table behind the biggest shelter that they also love to sit on.

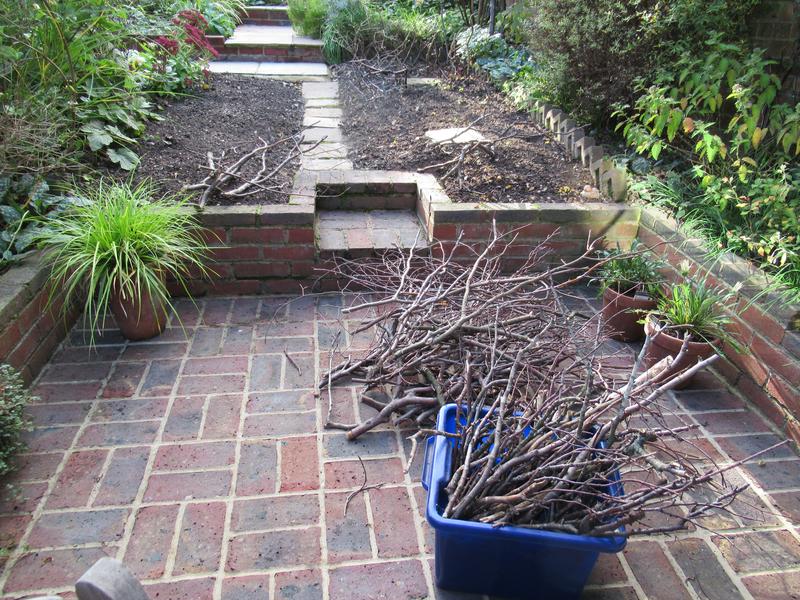
I  have recently given all the shrubs in the run a hard prune as they were getting up into the run roof and growing through the weld mesh. They have all had a hard cut back before winter but will grow back again in spring.

The weld mesh goes down under the ground and then horizontal on the inside of the run to stop anything digging in and outside there are rows of bricks where there aren’t path or patio slabs.

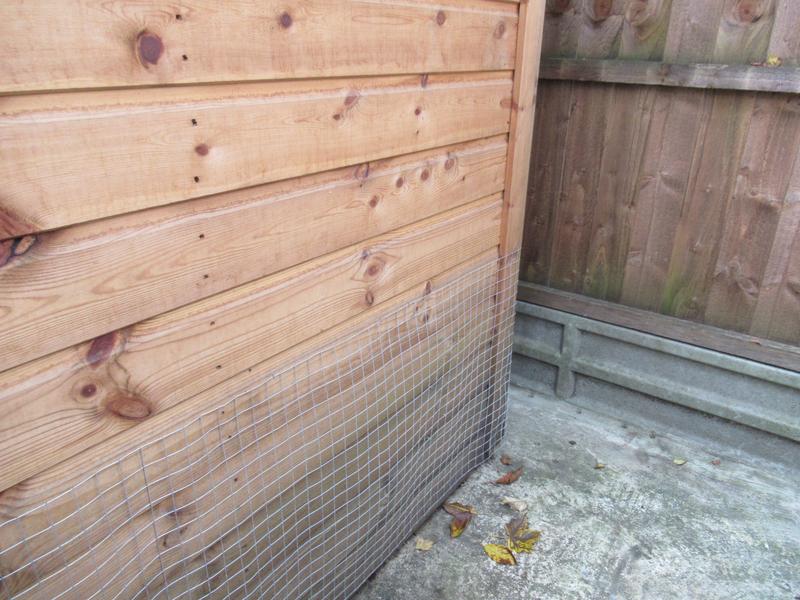
The outside of the chicken shed also has weld mesh stapled to the bottom three feet to give it extra protection from anything trying to chew their way in and is on concrete.

We have worked on the run to make it as secure as we possibly can.

The run has evolved over time. I am happy with it and it only needs occasional tweaks these days. Over the years we have been constantly improving it and I think it is pretty much as good as we can get it.

Posted in Chickens | 6 Comments

Little Mouse

Some of you may remember that I did a post about Little Mouse in the spring. We had been seeing a little field mouse in the garden and on the veg plot.

I then started seeing it in the chicken run in the early evening. It would run behind the chicken shelter and then come out again quite close to me. I managed to get a photo.

Little Mouse on April 26th

This was before I had my current camera as a birthday present from my husband in May. I could probably have got a much better photo with this camera. I wasn’t able to zoom with my old camera so this was fairly close.

I saw Little Mouse escape through the weld mesh so there is no way of keeping it out of the chicken run. As summer progressed we stopped seeing it.

About a week ago I became aware that it was coming back in the chicken run. I am of course just assuming it’s the same one, it may not be, but I like to imagine that it is. I haven’t seen it but when I moved one of the little coop nest boxes to sweep underneath there were six to eight tiny mouse droppings and some crumbs from chicken pellets.

I have been moving the little coop nest boxes every morning and sweeping away what is there and each time it’s been the same. There are always between six to eight droppings so I think it’s just a single mouse because there is such a small amount of evidence. One morning there was also a cherry stone so it seems it is bringing it’s own take away in too.

At the moment I am just going to leave it because as long as it remains at just one and the droppings are under the coop, away from the chickens, I think it’s not doing much harm. I am reluctant to put bait down and kill one little field mouse that may have been visiting all year.

As the days get shorter I will eventually take the food dish in at night and then there will be nothing for it to come in for. As long as we don’t suddenly end up with many mice I think it’s okay to just leave Little Mouse.

Posted in Chickens | 8 Comments